
|
Wendy approached me to help her with organizing her office and home because she “felt overwhelmed by so much ‘stuff.’ My home and workplace were cluttered and I didn’t easily remember what I owned or where things were located.” As a busy law professor and mother to one foster child while we were decluttering, she said she had no reservations about inviting me into her home and office. “Mrg was very professional in all of our initial communications and let me know what to expect. She was always nonjudgmental and trustworthy, both which made me comfortable letting her into my home.”
After introducing her to the principles of the KonMari Method®, Wendy developed a clear idea of what she wanted for her home. She said the hardest part of the experience was “getting started. But once I got started, I had traction to keep going.” Wendy picked up on the KonMari Method quickly and was soon making dozens and dozens of decisions every hour during our four-hour-long sessions. It can be draining, but it was worth it. The most satisfying part of tidying she described as “feeling much lighter,” referring to the sensation after separating the joy-sparking items from those that no longer serve their purpose. “It feels better to be in my work and home environments and I’m more motivated to keep them uncluttered.” When the 2 sessions for her office and 8 sessions for her home were completed, Wendy says she felt “freed from the tyranny of stuff.” For those items she chose to discard, Wendy was very thoughtful about the disposition. She gave some things to friends, donated others to thrift stores, or sold them on ebay or Facebook marketplace. She threw away or recycled the rest that were outdated or used up. And that thoughtfulness meant she didn’t feel guilty about getting rid of electronics she’ll never use, for example. When asked how she feels her lifestyle has changed after tidying both her office and her home, she proudly says “I feel like I have a different relationship with my ‘stuff’ and I want to only hold onto things that make me happy and/or that are useful tools to accomplish tasks I want to do. I more easily say ‘no thank you’ when people offer me something I don’t really need/want. It’s a process and I feel like I’m continuing to grow in the right direction.” And she now has time to enjoy her favorite room in her home, her living room. “It has great sunlight, a turquoise accent wall that I love, and a cozy sofa where I can read books or binge watch a good tv show.” She’s living the lifestyle she envisioned. After undertaking such a dramatic change, she admits that she has some challenges maintaining her tidy and organized home. “Good habits still need to be built and maintained. And I welcomed 2 new foster youth to my home so there are others contributing to clutter and a need to find more space. But I feel like I have the mindset to make more efficient decisions about whether to hold onto something, where to store it if I do, and I’m more likely to put things away in their designated place. I also don’t have to hunt for items nearly as much as I did pre-decluttering.” Her advice for others who are thinking of hiring a professional organizer? “Do it. It helps to have the support.” If you're interested in a free consultation about tidying your home or office, contact me today! Mrg Simon Professional Organizer KonMari Certified Consultant 605-929-1493 [email protected]
0 Comments
7/18/2023 0 Comments The Value of Routine In pursuit of an intentional life where you decide your own priorities, the value of routine behaviors cannot be overlooked. Good habits put your day on “autopilot” for many tasks, and you will get to the point where you rarely have to give much conscious thought to performing many tasks. Like making your bed, for example.
Two of the most powerful routines are having a consistent morning and evening set of habits. If you want to lead a deliberate life, it begins with allocating sufficient time to get your morning tasks completed and any caregiving tasks, too. You might want to get ready for your day first, and then wake up the rest of the household to keep a sharp focus on a successful start to everyone’s day, from breakfast to having everything each person needs when heading out the door. An evening routine makes sure that homework is done at a designated time, supper is planned out and - whenever possible - eaten together, the house is tidied and clothes are selected for the next day. All these basic habits are key to having “space” to take deliberate actions to meet your goals. It’s important to stick to these habits - many experts say that it only takes 21 days to form a new habit. Hang in there - you’ve got this! And for days when it just doesn’t happen, don’t beat yourself up and abandon all hope. Vow to get right back into that constructive routine so that you can experience smooth beginnings and endings to your day. That alone will reduce stress and lead to more joyful days. Once you’ve developed those good habits, add on another habit that will help you achieve your stated goal. Maybe reading a book during your last 20 minutes of the day will help you reach a goal to read a book each month, for example. Routines are the building blocks of success. In pursuit of an intentional life where you decide your own priorities, the value of routine behaviors cannot be overlooked. Good habits put your day on “autopilot” for many tasks, and you will get to the point where you rarely have to give much conscious thought to performing many tasks.. Two of the most powerful routines are having a consistent morning and evening set of habits. If you want to lead a deliberate life, it begins with allocating sufficient time to get your morning tasks completed and any caregiving tasks, too. You might want to get ready for your day first, and then wake up the rest of the household to keep a sharp focus on a successful start to everyone’s day, from breakfast to having everything each person needs when heading out the door. An evening routine makes sure that homework is done at a designated time, supper is planned out and - whenever possible - eaten together, the house is tidied and clothes are selected for the next day. All these basic habits are key to having “space” to take deliberate actions to meet your goals. It’s important to stick to these habits - many experts say that it only takes 21 days to form a new habit. Hang in there - you’ve got this! And for days when it just doesn’t happen, don’t beat yourself up and abandon all hope. Vow to get right back into that constructive routine so that you can experience smooth beginnings and endings to your day. That alone will reduce stress and lead to more joyful days. Once you’ve developed those good habits, add on another habit that will help you achieve your stated goal. Maybe reading a book during your last 20 minutes of the day will help you reach a goal to read a book each month, for example. Routines are the building blocks of success. In pursuit of an intentional life where you decide your own priorities, the value of routine behaviors cannot be overlooked. Good habits put your day on “autopilot” for many tasks, and you will get to the point where you rarely have to give much conscious thought to performing many tasks.. Two of the most powerful routines are having a consistent morning and evening set of habits. If you want to lead a deliberate life, it begins with allocating sufficient time to get your morning tasks completed and any caregiving tasks, too. You might want to get ready for your day first, and then wake up the rest of the household to keep a sharp focus on a successful start to everyone’s day, from breakfast to having everything each person needs when heading out the door. An evening routine makes sure that homework is done at a designated time, supper is planned out and - whenever possible - eaten together, the house is tidied and clothes are selected for the next day. All these basic habits are key to having “space” to take deliberate actions to meet your goals. It’s important to stick to these habits - many experts say that it only takes 21 days to form a new habit. Hang in there - you’ve got this! And for days when it just doesn’t happen, don’t beat yourself up and abandon all hope. Vow to get right back into that constructive routine so that you can experience smooth beginnings and endings to your day. That alone will reduce stress and lead to more joyful days. Once you’ve developed those good habits, add on another habit that will help you achieve your stated goal. Maybe reading a book during your last 20 minutes of the day will help you reach a goal to read a book each month, for example. Routines are the building blocks of success. With a joyful heart, Mrg Simon [email protected] 605-929-1493 6/5/2023 0 Comments 4 Easy Steps to Conquer Paper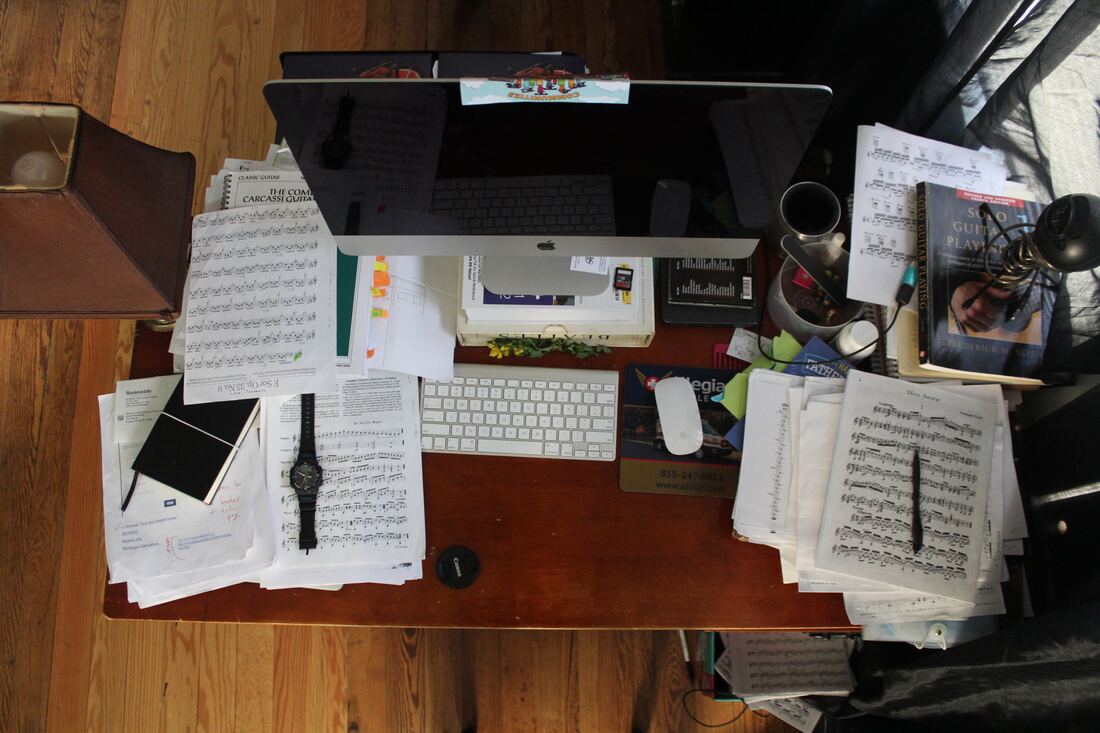 Our homes (and offices) have failed in the promise of the “electronic age” to let us all go paperless. Those many stacks of papers and files piled along every horizontal surface in some offices are a testament to the paper paralysis. And if that describes your home, take heart: that paralysis can be cured if you’re ready for some simple work that will pay dividends well into the future. One of the KonMari MethodTM keys to success is that you rid yourself of all paper (with a few exceptions). It is totally doable and freeing!
There are many emotional reasons we hold on to paper: we’re afraid we’ll forget, we know “responsible people” hold onto paper, that little voice in our heads warns “you may need that someday,” or the volume is just so overwhelming that we don’t even know where to start. At the same time, we fear that we may be missing a graduation party a or an overdue bill we can’t seem to find. Put that stress behind you and tackle your paper now with four steps: 1) Big Purge, 2) Sort, 3) Action, and 4) Maintenance. Big Purge: Set aside a few hours after work or on a weekend to start tackling this problem. Begin with the “Big Purge.” Go through every paper in your house (yes, every one) and discard the ones that are not needed and sort the ones that are. (Keep in mind information supporting tax returns should be kept for 7 years after the filing date.) It’s very helpful to first gather five boxes for your sort and label them: Recycle, Shred, Pending (action items for this week), Save, and Scan. Establish some guidelines like all manuals will be thrown away (you can find them on the internet), only one piece of your children’s artwork, homework, or report card will be saved for each grade; honors and awards will keep up to ten, for example. You have to decide these things in advance if you’re going to have success. Sort: Then, start your Sort with the most current piles. When determining whether a paper is needed, ask yourself a) Is it still useful? b) Did I ask for this document and if so, why? c) Can I find this information elsewhere – in my electronic files, on the internet, etc.?, and d) What’s the worst thing that could happen if I get rid of this paper? Your aim should be to discard as much paper as possible. Sort quickly and thoroughly. Don’t try to deal with each item as you go along; you’ll get sidetracked. If something needs to be scanned first, put it in the Scan box – but don’t use that to avoid making hard decisions. Don’t let your emotions get in the way, or you’ll be wasting a lot of time (or a lot of someone else’s time) scanning things you really don’t need. Once you’ve made it through the piles around your home office, schedule time to go through the files in the kitchen, the mudroom, the living room – anywhere papers accumulate in your household. Touch every single piece of paper. Get rid of as much as possible. All the while, keep using your bankers’ boxes. Keep a close eye on the one labeled “Pending,” and assign one day each week to go through that box and act on each item that needs to be done. When completed, get rid of the paper if you can, or assign it to one of the other boxes. Action. Once you’ve purged and sorted and you are minding your Pending box every week, you can then take Action on each of the items in the labeled boxes. Set a schedule for the time to get this done. Enlist the help of an assistant if you can – completing this step is important. If you take too long for this step, you will slip back into your old habits. After the Big Purge, the Sort, and Action, then it’s a matter of Maintenance. You’ll find you now have a healthy amount of skepticism about paper and whether to print something. It’s okay to do so, just be sure to dispense with it appropriately as soon as its usefulness has passed. With your paper paralysis now cured, you’ll find a sense of relief having regained control of your physical space, and so many distractions will be eliminated. And you’ll also find that you have a better grasp on what’s in all your essential paper files. The steps are simple, the payoff is huge. Just make the commitment and do it! Mrg Simon South Dakota attorney and Certified KonMari Consultant [email protected] or 605-929-1493 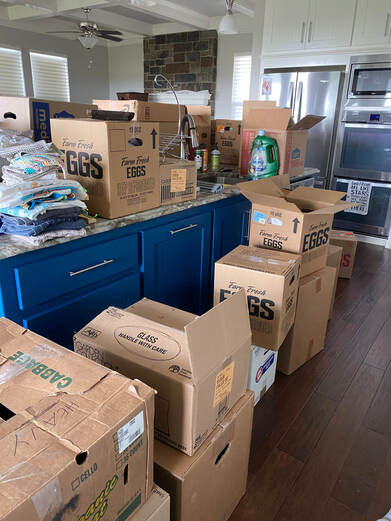 The second biggest task in moving your entire household is unpacking. And by second, I don’t mean it’s less effort, just that it comes after the packing. I’ve lost track of how many times I’ve moved but one thing I know: I long for everything to be in its placed and organized in as short a time as possible. Here are some tips I used that just might work for you:
1.Unbox before organizing* Take as much out of boxes as you can before you start putting things away. You’ll need to visualize everything in each category that you want to store together and, if by chance you discovered some duplicates, you can address them before storing 3 bottles of window cleaner. 2.Assess available storage space Your things might no longer fit in the same room or general area that they were stored in at your previous home. This is painfully true if you’re downsizing. I used to always store garbage bags under the kitchen sink – in every house. This one? The plumbing takes up half the under-sink storage. Where’s the next most logical place where they will fit? In my case it’s the pantry, even though that’s 3 more steps away from the garbage can. We’re still getting used to it. 3.Mimic prior storage systems If it worked effectively in the past, then go ahead and put your pots and pans in the same space relative to the range. Just because you now have more kitchen storage doesn’t mean you should upset a system that’s working. 4.Re-think categories I used to keep cleaning supplies distributed to the place where they were used: tile cleaner in each of the bathrooms to increase the chance that it will actually be used by teenagers. And the bulk of other cleaning products under the kitchen sink. Since that’s no longer available due to size constraints, it’s natural to store all cleaning products in one central location. So, I minimized duplicates and put them in a linen closet just off the kitchen. It actually gives me a better set up in some respects. Be flexible. 5.Take your time This isn’t a race. I know I was anxious to get everything put away and rid myself of boxes. But I’m glad I took time to think things through. Had I rushed, I know I would be frustrated but likely too stubborn or lazy to take the time to rework a couple spaces to accommodate everything the best way. On the other hand, if it’s just not getting done, create time in your schedule for unpacking just like you would for a meeting or appointment. 6.Rearrange if it doesn’t work If you find yourself looking in the wrong spot for something time after time, ask yourself whether that isn’t a more logical place to store it. If your kids are constantly asking where something is because they genuinely can’t find it, then you should look for a more logical home for that item(s). 7.Recycle As you unpack, break down your boxes to save space. That also makes it easier to dispose of them. Most communities have cardboard recycling or check your local FreeCycle or social media for others looking for boxes. And when you’re done, remember to thank your prior self for all the decluttering you did before moving! *If you bought moving insurance and you find damage while unpacking, stop and take photos of the box, unboxing, and the damage. Include photos of the item prior to damage, if available. Then submit a claim to your moving insurer if the value (combined) of all damages exceed the deductible. Until next time! Mrg Simon Professional Organizer Certified Kon Mari Consultant (605- 595-3766 [email protected] 4/3/2023 0 Comments Packing tips for a Smooth Move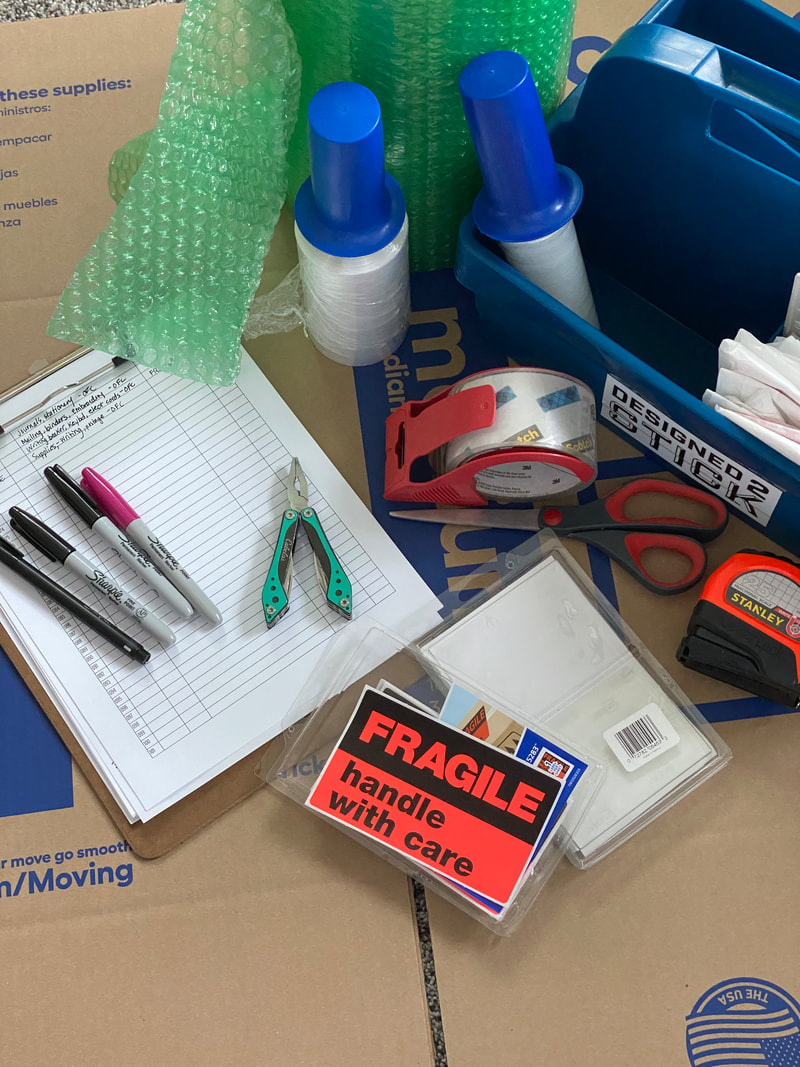 This month’s blog post is very personal because I’m in the middle of a cross country move from South Dakota to Texas. Since I’ve been married, we’ve moved nine time and I’ve got a system down to make life easier on you ... and your movers (whether that’s you or someone else).
1. Create a Packing Kit. Gather everything you need to pack: tape, plastic on a roll, scissor, tape measure, black marker, red/pink marker, multi-tool, FRAGILE stickers, and a notebook or clipboard. Keep all those items together in your tool box and you’ll save yourself the repeated frustration of trying to figure out where the marker or tape is at. It’s wise to also buy blank newsprint paper and bubble wrap to cushion your belongings. 2. Consider buying insurance. If you’re having a commercial business do your move, ask about the insurance they offer: basic and replacement value are usually the options. Or if you’re doing it yourself, check with your homeowner’s or renter’s insurance agent. The important thing to know is that only the full market replacement value will reimburse you at a level equivalent to your cost to replace the item. Otherwise, the carrier’s liability is limited, sometimes to $100 per item/box. If you insure your move, check the fine print: you will be required to do an inventory and identify any objects/boxes with a value over $100. This is required if you want to make a claim. 3. Inventory your items. Regardless of whether you’re insuring your move, consider creating an inventory of your possessions now that you can update every time you move. It’s a great tool for keeping track of your belongings, and for use in homeowner’s or renter’s insurance claims. Give your insurance agent a copy because without that, theft of an expensive electric bike, for example, will not be covered without proof of ownership and value. Make a simple spreadsheet to number each item, provide a description and comments (such as FRAGILE or ID numbers), and where each item goes in your home. You can create separate sheets for unboxable things like furniture, highly valuable things like collectibles, art and jewelry, and things typically kept in storage. (Be sure to include any off-site storage, too.) 4. Get boxes. These can get expensive if you have to buy all of them, so make friends with staff at your local grocery store. The bakery, floral, and wine departments have very good boxes, in uniform sizes, and they get shipments every day and they’re consistent sizes. If you don’t rescue them, the store will bale them and pay someone to take them off their hands. However, be prepared to buy specialty boxes for specific items, like art work and wardrobes. The better things are boxed up, the easier it will be to load up. 5. Label on top and side. You want to be able to tell at a glance what is in a box, and your mover needs to know, too. On the top and one side of the box, write the contents of your box, and the room where you want it put when they are delivering your goods. If boxes are stacked, you’ll be able to read what’s in them, as well as if you’re carrying a box you’ll be able to read from the top of the box. Resist the urge to just put everything in the garage – your goods can get damaged by heat and cold, as well as pests. Save yourself a second trip and deliver to the room where your items will live. 6. Fragile and heavy items. Do yourself a favor and buy the orange “FRAGILE” stickers (I got mine at Office Max – no affiliation). I apply mine so part of the sticker is on the top of the box and part on the side – just to cover my bases. Make sure that if you’re keeping an inventory, you note which items were marked fragile or heavy. 7. Organize the contents. Make sure that everything you put into the box belongs in the same room. With the exception of towels and pillows that you might use for padding, filling a box with things from various rooms will create more work for you unpacking. Do yourself a favor and keep each room separately boxed. Use blank newsprint or bubble wrap to keep items from rubbing against each other as the moving truck bounces down the highway. It may seem over the top, but you’ll have virtually no breakage if you follow this tip. It might seem like there are a lot of excess steps, but if you want your belongings to arrive safely or (heaven forbit) if you need to make an insurance claim, you’ll be glad you followed these steps. Trust the voice of experience and organization and you’ll have a smooth move! Wish me luck, friends, I'm into the final stretch this week! For the last time, goodbye from South Dakota! Mrg Simon Professional Organizer KonMari Certified Consultant [email protected] 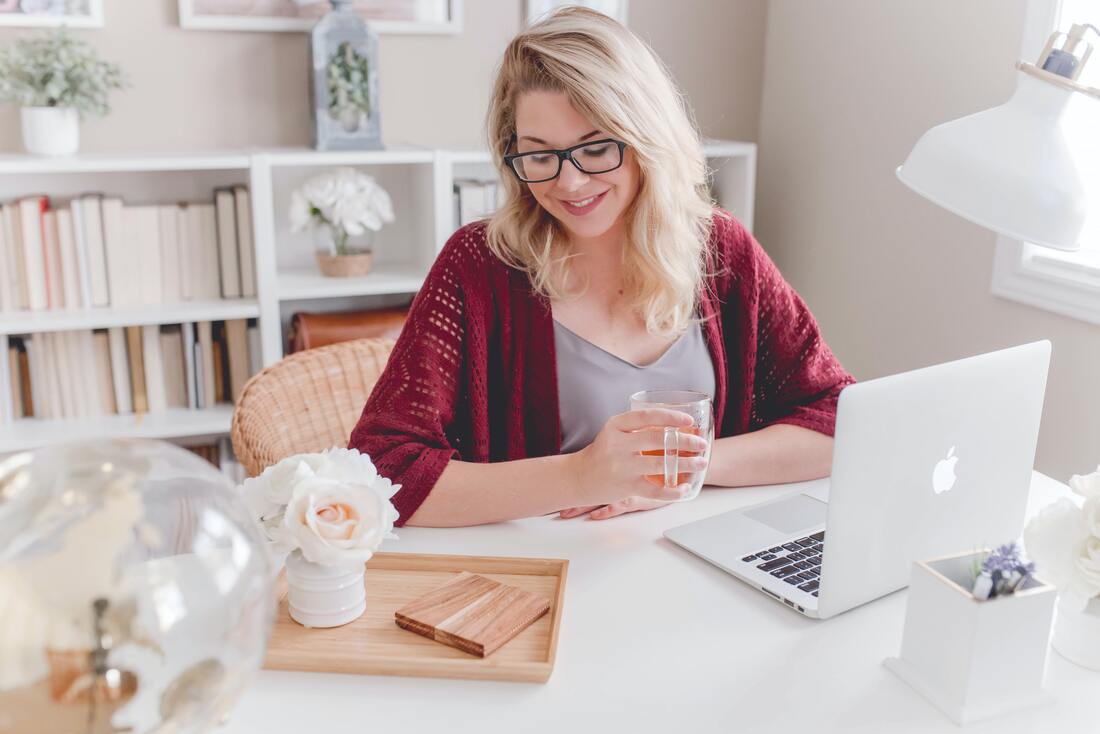 The work-from-home trend is here to stay, whether it’s full-time or only occasional. That means you need a space to function in a way that supports your vision for your working future. That might be spending more time with family, snagging a promotion, or starting your own business. Your vision should be uppermost in your mind as you design and tidy your workspace at home.
1.Designate a room or space that accommodates your needs. If you are fortunate enough to have a separate room for your office, make sure that other functions don’t overwhelm the space, such as work out equipment, for example. You want as few distractions as possible. If you don’t have a spare room, designate a specific place in your dining room or living room – wherever you can find room – and claim it for your own. Just be sure that at the end of the day, you can put it away or conceal it so you can set clear boundaries between your business and personal time. 2.Gather all supplies in one space. Marie Kondo stresses the importance of keeping like items together, both for ease of finding them and putting them away. If you have office supplies scattered about the house, consolidate them in one basket or container so they are at the ready when you need them. This will minimize distractions and increase your productivity. And you want to maximize your productivity so you can enjoy your time at home! 3.Make your office joyful. Just because it’s an office, doesn’t mean that it has to be all work. Your space should have something(s) in it that speaks to you, inspires you, and helps you recall your vision for you home office. Maybe it’s a picture of a trout fisher or skiing with family and friends – things you will have more time to do when you manage your home office time efficiently. Whether you have a designated space or designated room for your office, your time will be spent more effectively when you follow these tips. Then you can enjoy your time in your home office because it will align with your vision for your work’s future. With a joyful heart, Mrg Based on “Tidying the Home Office,” by KonMari Media Inc. on KonMari.com, last accessed March 6, 2023. 2/9/2023 0 Comments Finding Joy To find joy and meaning in your life, it’s important to know joy when you feel it, see it, taste it, smell it, and touch it. In the KonMari Method,® Marie Kondo teaches that joy is the standard that should govern your life, from determining what clothing to keep and what to dispose of, to choosing to take a vacation and shopping for groceries. But what exactly is “joy?”
Joy is more than a fleeting happy moment, it goes deeper. At its core it’s a feeling. It’s the feeling you get when you discover a long-lost picture of your child feeding geese by hand at the state capitol all those years ago. It’s the way you feel when you slip into your most comfortable pair of jeans. Joy comes from a deeply personal place in your soul and your body reacts positively to the sensation. Consider those jeans. What if you put them on and they were too tight? What if your ex saw you when you were wearing them? Would you still feel confident and comfortable, or would you be embarrassed and self-conscious? Instantly, you know whether those jeans bring you joy. The more you ask yourself these questions, the better you will become at figuring out what brings you joy. Hone your radar and you will begin to notice those things that bring you a sense of calm, relaxation, thrill, and personal connection. 1/11/2023 0 Comments 4 Easy Steps to Get Organized!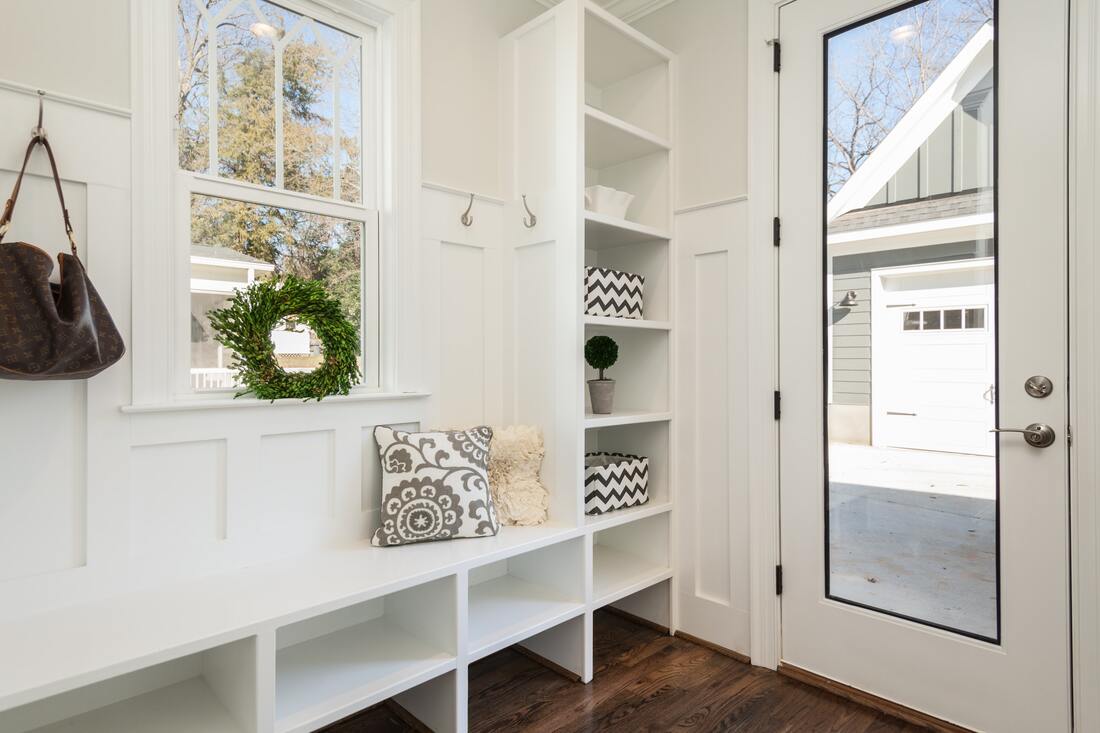 With the holidays behind us and a brand new year ahead of us, it seems logical that January should be "National Get Organized Month." Most of us – even professional organizers – have something in their home or office they’d like to have decluttered or better organized. These cold winter days are a perfect time to tackle a new project with a few tips and tricks.
1. Be clear on what you want. Don’t just go out and start buying bins, boxes and baskets to organize things. First, determine why you want to tackle this project. Is it simply to tidy up or is it to, for example, have a mudroom that functions to make your family’s comings and goings more efficient? If you set aside the time to clean the mudroom, you’ll have a clean mudroom. For the time being. But if you’re looking for a space that supports your family’s efficiency coming and going, you’ll have to do things differently if you want a different, long-lasting result. 2. Be clear on what functions to keep. In the act of decluttering, we seek out those things that support our vision and bring us joy, and discard those that aren’t up to the task. Likewise, your space can only serve a limited number of functions well. That mudroom is a great place for coats, hats, boots and backpacks. But if your kids are stashing iPads and other handheld devices there, that is a dangerous place to store electronics and it’s inconvenient, too. How about the dog bowls, leashes, and dog food? It is a logical place with room for that function? If not, find a better suited place for pet supplies. 3. Make it easy to keep it tidy. To the extent possible, store things where you use them – that makes it easy to put items away when you’re done using them. You wouldn’t store bedsheets in the kitchen, but you might store them in a linen closet near the bedrooms or in the bedroom closet so they’re handy when it’s time to change sheets. 4. Enjoy a job well done. Once you’ve decluttered, organized, and aligned functions of your space, you should take time to appreciate the new-found efficiency of your space. That enjoyment or little reward is what reinforces your new behavior and will, over time, create positive habits that support your vision for what you want. Once it’s a habit, you and your family can ‘automatically’ keep your space tidy and save time for activities you’d rather be doing. With joy, Mrg Simon Professional Organizer Certified KonMari(r) Consultant [email protected] 605-929-1493  As a professional organizer, I help all sorts of people take control of the physical items that are overwhelming them in their homes and offices so they can find the joy in their surroundings. Equally important for a well-rounded, organized life is managing your time. We all know time management doesn’t just happen automatically, and most systems focus on efficient use of your time while ignoring whether your career and life is meeting your needs for connection and satisfaction. Focusing solely on productivity and efficiency overlooks the larger picture of organizing your life for meaning in exchange for divvying up your busy day-to-day lives.
To achieve satisfaction and even joy in your life – both personally and professionally – requires a deliberate and intentional effort. Establishing a written roadmap for your year, your months, and your weeks is vital to realizing your ultimate vision for your life. What is the point of being more organized and having more time in your life if you don’t use that time to bring more joy into your life? I’ve developed an annual planning system that helps me get the most out of my life so I can look back on each year with a sense of accomplishment and look forward to the next year of adventures of all kinds. It’s based on the concept of a “bullet journal,” but skips the rules, symbols, and artistic flair throughout that make it feel like just more work. My planner is flexible and useful in more ways than I can count. The basic concept is that your days, weeks, months and years can fly by at the speed of light and if you have taken time to thoughtfully map out that time, it will be well spent and full of memories. My planner is called My Intentional Year: Organizing My Life for Joy and MeaningSM and it depends first on writing down your intentions, commitments, appointments and other events, either electronically or manually in a journal of some sort. For maximum fun and historic value, I use a journal (Leuchtturm brand 1917 or a Moleskin brand 5” x 8.25” with at least 200 pages, available in local bookstores and on Amazon.com) because I do like to draw and use decorative lettering in my book to keep it interesting and to focus my attention. You should use it in whatever way works best for you. I have four areas of focus, five if you count the creative and inspiring bonus material. 1.Your Intention and Vision. As you start each year, you should do so with intention. Establish a theme for your year to keep you inspired month after month. Write your theme on your opening pages to keep it top of mind. For example, in 2022 I adopted the theme “Celebrate more!” At the end of each month, I identified my “wins” and celebrated them. Like a metaphorical pan on the back. Then, at the end of the year, I list them all and demonstrate to myself just how much I have accomplished. That really helps to stave off the end-of-year burnout when I wonder just what I got done in the last 12 months. The beginning of the year is also the perfect place to write down your vision for what you intend to accomplish in your life, on a professional and personal level for the calendar year, including specific goals. Then, be sure to check in with it throughout the year to see how you’re doing at achieving your vision for this year. 2.Future Log. Next, I take a broad look at big events I anticipate throughout the year. I create what’s called a “future log” by bullet journal aficionados. It’s a space to write down each month of the upcoming year (February – January) and identify any special things going on during each month. I use mine to record birthdays and anniversaries, annual events and holidays, and I leave space for future appointments that extend beyond the months laid out in my journal. 3.Monthly Calendar. Next, for those who are into stress relief through drawing, I have a cover page for the month which I often use to establish my decorative theme for the month. Then, I reproduce the calendar for the month as the next page(s) – I usually use a 2-page spread. I like to write on the calendar the recurring activities and one-offs that are on the docket for the month. I also embellish this page to echo the theme for the month (optional). I find it makes my life a little less pedestrian to have my own designs reflecting back at me as I check my calendar while booking new appointments. 4.Weekly layouts. Finally, the meat of My Intentional Year is the weekly spreads. What works best for me is to organize them Monday through Sunday, with the weekend days sharing a space to make for 6 even areas to record my daily commitments and activities. It takes a little getting used to but for me, it mirrors the way I plan my life: my work week first and then my weekends are separate. My weekly spreads are where I intersperse inspiration quotes and drawings. If I know it’s going to be a tough month motivationally speaking, I will find inspirational quotes to hand letter and use cheery colors to decorate them with colored pencils. Then onto where the “bullet” part of the bullet journal got its name. Next to each entry on individual days, there are coded boxes to represent tasks that are started, completed, canceled, moot or rescheduled, along with symbols for appointments and meetings, events, urgent items, email, call, to buy, and just plain notes. These are all items that are fair game for your daily entries, but all those symbols took up more RAM than I had available in my brain. Some days it’s all I have to just jot down a few scribbles. 5.Bonus Material. The real secret sauce for My Intentional Year is in the separate lists that I make to keep track of specific things in my life. In my first journal, I even made a List of Lists! Over the course of a month or a year, there are so many things that you could keep track of such as client numbers, depositions taken, trials conducted, CLEs attended, books you’ve read, movies you’ve watched, exercise log, gratitude pages – the list goes on and on. One I find particularly useful is “The Last Time I ...” where I can record the last time the bar dues were paid, the certificate of compliance was filed, the mandatory training was completed, employee reviews were conducted, or things like when furnace filter was changed, the windows were washed, the car had an oil change ... you get the idea. I even leave room for journaling at the end of each month just in case I want to record some specific thoughts about that month’s happenings. The steps I have summarized might seem like a lot of work. Why not just use a regular planner? Because it won’t prompt you to reach back and look at your goals and your vision. It won’t give you time to pause and think about what brings meaning to your career and your life, and give you more control over what you do instead of letting things just happen to you. Your personal and professional satisfaction is key to making your life at home and at work enjoyable every day. With such high rates of depression and uncertainty these days, we must be proactive, deliberate, and intentional if we’re going to make this next year count! Organize your year for joy and meaning with the “My Intentional Year” approach to planning. P.S. I am creating a focus group to follow the 2023 Intentional YearSM process, complete with printouts for the entire year and occasional Zoom classes to discuss the process, your successes, and your suggestions. If you’d like to be part of this focus group, email or call me before December 15, 2023. Please use the phrase “Focus Group” in your email subject line. Mrg Simon Certified KonMari® Consultant and Professional Organizer 605-929-1493 [email protected]  As the holidays approach, I’d like to focus on an often-overlooked category of organization: hosting holiday guests, including overnight guests. November and December are when we gather more frequently indoors and for longer periods of time.
If you have guests coming over and haven’t done a whole-house tidying, there are ways to quickly declutter your home to spruce up your surroundings and make guests most comfortable. Marie Kondo has four quick tips that will put you and your guests at ease. 1. Do a “Joy Check.” In her tidying tips, Kondo puts joy at the center of everything – it’s a guiding principle that will serve you well in so many situations. Stand at your door and observe the shared spaces with the fresh eyes of a newcomer, going room by room to objectively evaluate whether the things you’ve piled up or thrown in a basket really do bring you joy. If you’re unsure, take time to reflect on whether these items pass the “Joy Check.” If they don’t, thank them and let them go. 2. Decide Where Things Belong. On your journey through your spaces, you likely found some things around the house that didn’t have a home. Seize this opportunity to decide where each item belongs, and make sure your other family members know so they can find things and put them away after use. TV remotes can go in a tray on the coffee table, mail goes in your “pending” box on your desk, coats go in the closet. To maintain all the tidying you do, everyone must know exactly where everything belongs. 3. Keep a Neat Kitchen. The kitchen is the hub of the home and a natural gathering space for guests. Before they arrive, declutter your counters of all the relatively small things that distract from your kitchen and its counterspace. Find a new home for your toaster, your dish soap, and your teapot. Once you’ve done that, wipe down the counters (and spot check the backsplash and cabinets). Then, keep the area around the sink clean – it’s the focus of the room and you’ll have a tidy kitchen that you and your guests can enjoy. 4. Tidy the Guest Bedroom. The holidays can be unpredictable and even if you don’t think you’ll be needing your guest room, it should be ready for guests at a moment’s notice. Do a serious “joy check” around the room and closet. Rather than using it as a room to store seasonal items, creating a welcoming, tranquil, and private space for them will make them feel right at home. Recall your best relaxing hotel or spa experience and try to recreate the feel, the scent, the appearance, and the function of the room. Consider having an arrival basket with tea, snacks, phone charger, and wifi password. Provide crisp sheets and an extra comforter, and stock items for them that they may have forgotten such as toothpaste, cotton swabs or a hair dryer. Collect travel size items and put them in a basket in the bathroom that they can easily find. These four tips can be easily done in just an hour or two. Once you’ve crossed these off your to-do list, you’ll have a tidy home that both you and your guests can enjoy throughout the season. Happy Thanksgiving to all! This article is based on blog posts by KonMari Media Inc. entitled “How to Tidy Before Hosting Guests” and “Fall Tidying Challenge: The Guest Room,” available at konmari.com. Mrg Simon Certified KonMari® Consultant and Professional Organizer 605-929-1493 [email protected] |
Archives
August 2023
|
Search by typing & pressing enter
 RSS Feed